Being promoted is quite a moment. It demonstrates that you’re a competent professional who’s ready for new challenges and that the company has faith you’ll get the job done! Sharing the news about your new responsibilities is a natural response, and there’s no better place to do that than on LinkedIn.
Of course, you may wonder how to add a promotion on LinkedIn. After all, there’s no “add my promotion” button on your profile. Fortunately, there are two easy methods for adding the exciting news to your LinkedIn profile.
Why You Should Add a Promotion on LinkedIn
Getting promoted is an accomplishment you should be proud of and probably want to share with your professional circle. LinkedIn is a great avenue for that, but there are two additional reasons to add your promotion to LinkedIn.
First, it demonstrates that you’re active on the platform. You may not be a fan of liking or posting on LinkedIn, and that’s OK. But when recruiters search for candidates on LinkedIn, they want to engage with someone who is actively engaged. If your profile shows zero activity and that you’ve been in the same position for years, they may wonder if you created a profile and forgot about it.
Adding your promotion to your LinkedIn profile demonstrates that even though you don’t use the “social” aspects of the platform, you are paying attention to your profile — meaning it’s more likely you’ll see a recruiter’s message if they reach out.
Second, when you add your promotion, you’re preparing yourself for a future job search. If you apply for a role using LinkedIn Easy apply, you won’t have to update your profile in a rush. And in the event you need to download your LinkedIn profile as your resume (it happens), yours is ready to go.
>>MORE: Should You Use LinkedIn Easy Apply?
When You Should Post a Promotion on Linkedin
Once you find out about your promotion, you may be excited and in a hurry to share the good news. However, that might not always be the right move.
Ideally, you’ll post your promotion on LinkedIn sooner rather than later, but you shouldn’t add the details before it’s public knowledge. Wait until the rest of the company knows you’ve been promoted.
Once your coworkers know, you can add the promotion to your LinkedIn profile, but even then, consider waiting. You may want to settle into the role a bit before adding a description of your duties and accomplishments.
How to Post a Promotion on LinkedIn (2 Methods)
There are two ways to add a promotion on LinkedIn.
Open Your LinkedIn Profile
Start with your LinkedIn profile. The easiest way to get there is to log in to your account. From your newsfeed, click the down arrow next to “Me” in the upper right. That will drop down some menu options. Hit “View Profile” to see your LinkedIn profile.
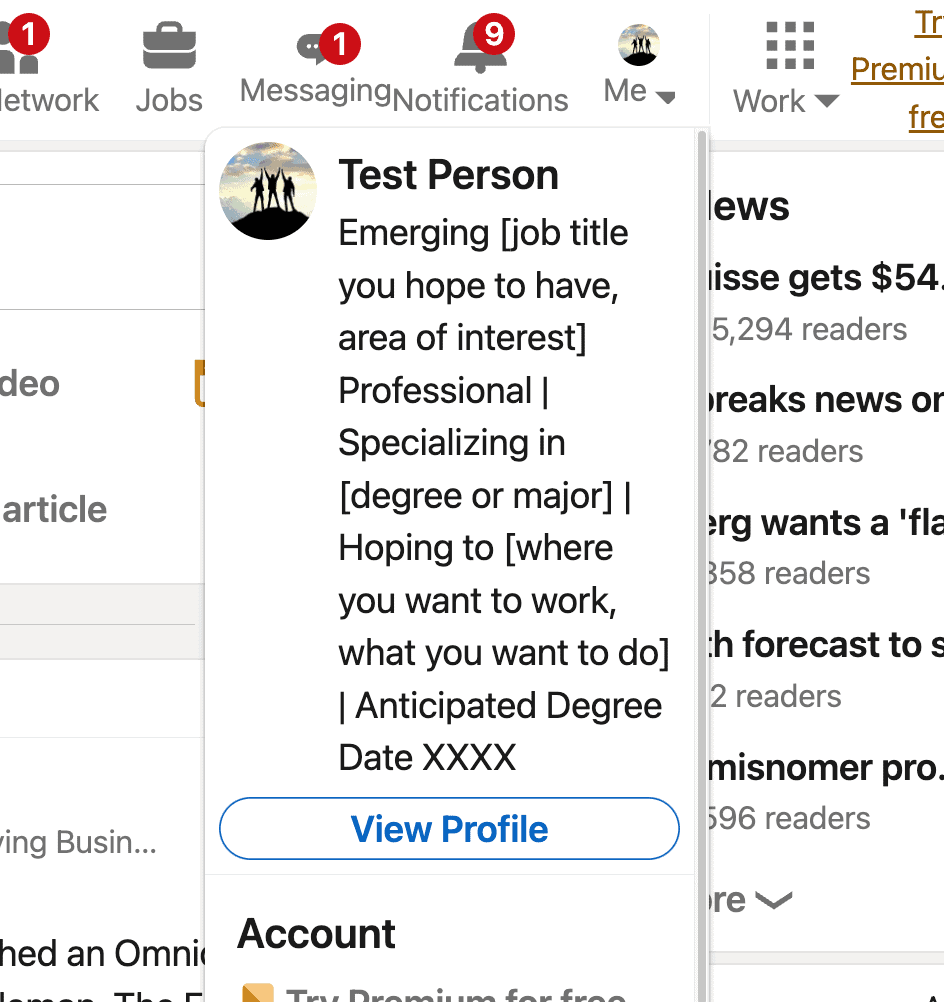
Head to Your Experience Section
On your profile, scroll down to the experience section. It’s between “Activity” and “Education.”
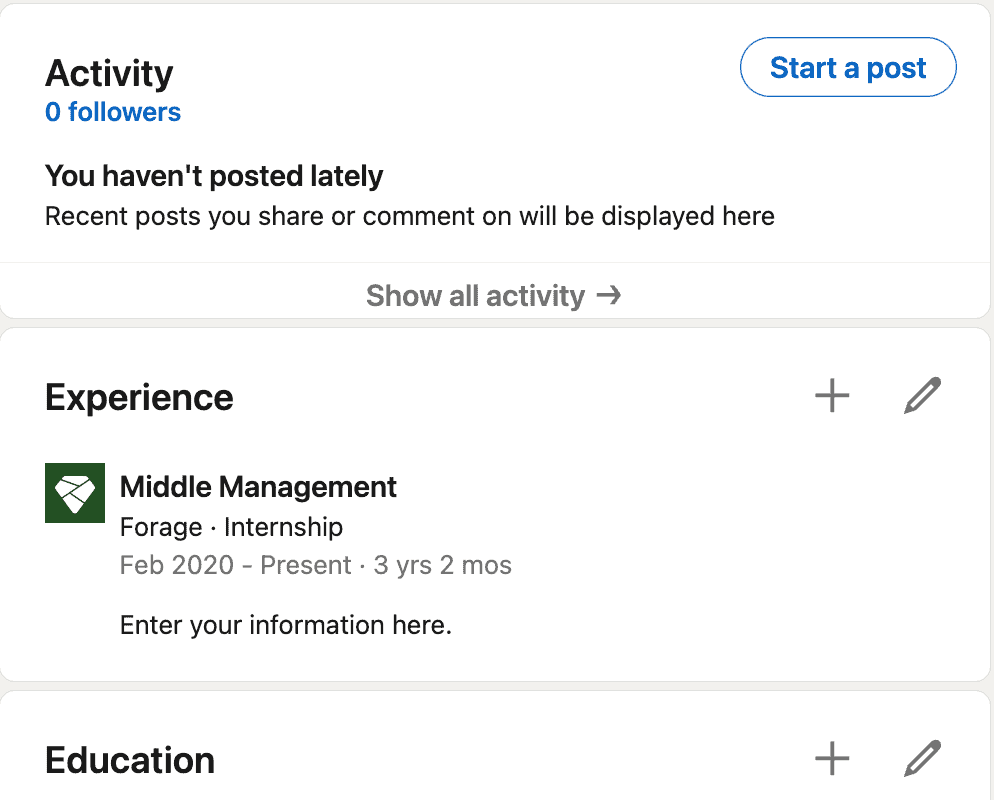
Method 1: Next to the company you’re currently working for, hit the plus sign
OR
Method 2: Hit the pencil icon
Add a Position
Method 1: The next menu that pops up has two options: “Add position” and “Add career break.” You want to add a position. Click that to add your promotion to your LinkedIn profile.
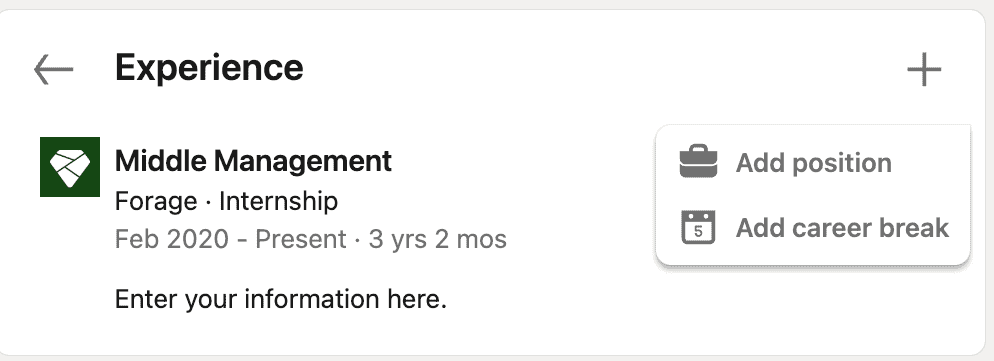
Method 2: You’ll be taken to the experience section with all of your work history. Hit the pencil icon (yes, again) next to the company you want to add the promotion to.
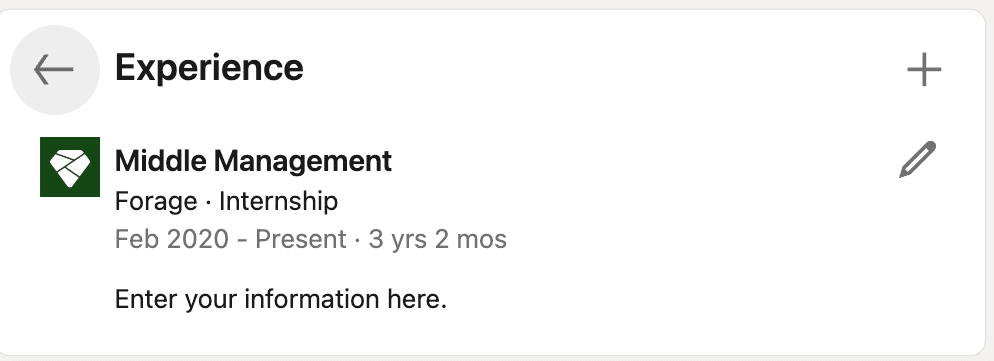
Add Your Promotion Information
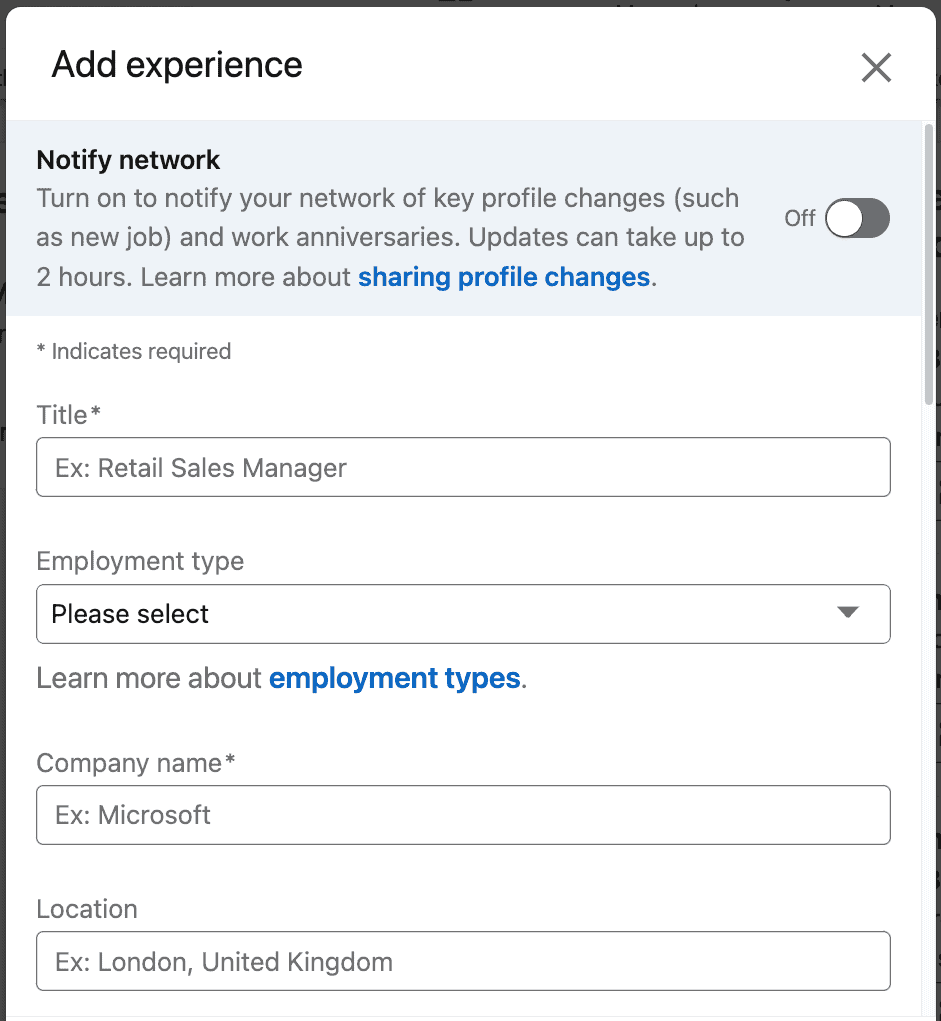
Method 1: You should now be on the “Add experience” screen. It looks just like the fields you’d use to add a new position at a new company. Fill in those fields with your new title and responsibilities (in the description field). Interestingly, you’ll need to add your company’s name even though you haven’t changed employers.
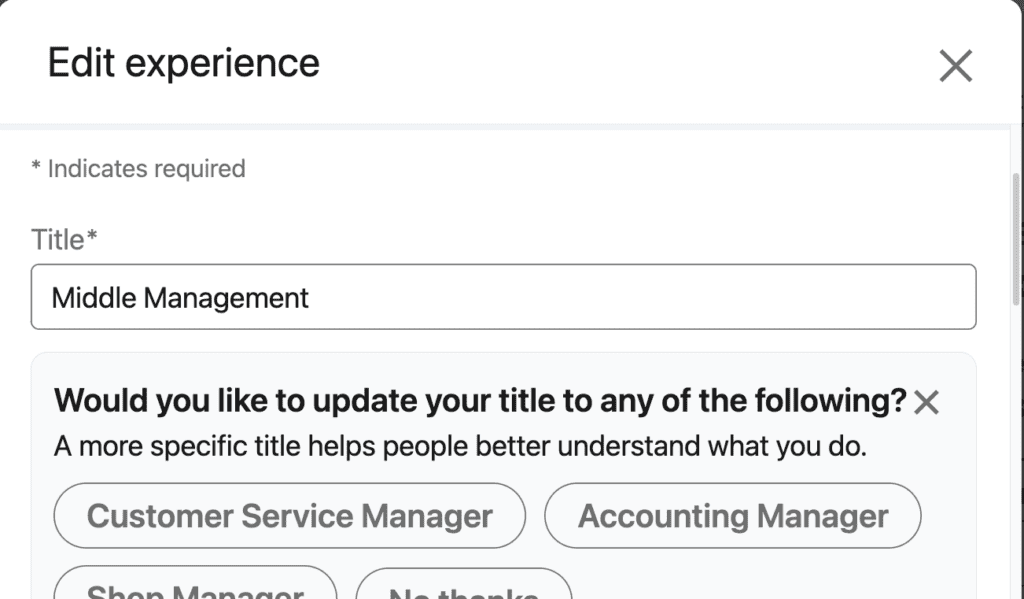
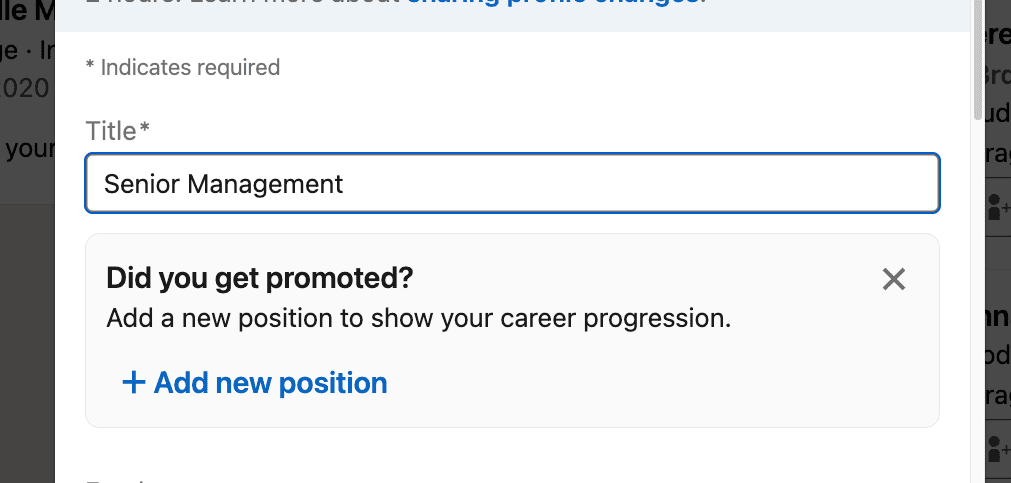
Method 2: You should be at the “Edit experience” screen, and the title field will have your current title. Delete your current title (it’s safe, we promise!) and replace it with your new one. A new box will appear that says, “Did you get promoted?” Click “Add new position,” and you’ll be taken to the “Add experience screen.” If you use this method to add your promotion, your company information will already be filled in.
Update Your Dates
After you fill in the title and other information, scroll down a bit.
Method 1: You’ll see the “I am currently working in this role” box. Click that and fill in the start date of your promotion. A new option will appear just below the “end date” fields: “End current position as of now” with your current title. Click that box to indicate you no longer hold that title.
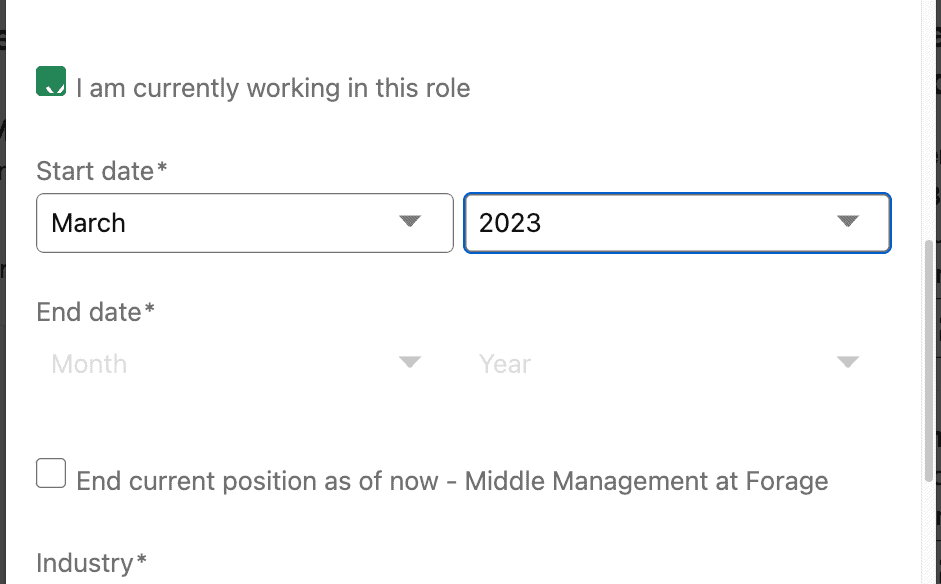
Method 2: The “I am currently working in this role” box will already be checked off. By default, LinkedIn will fill in the current month and year. If your promotion happened earlier (say February, using the above screenshot), you’ll have to update the information.
Save and Share the Good News
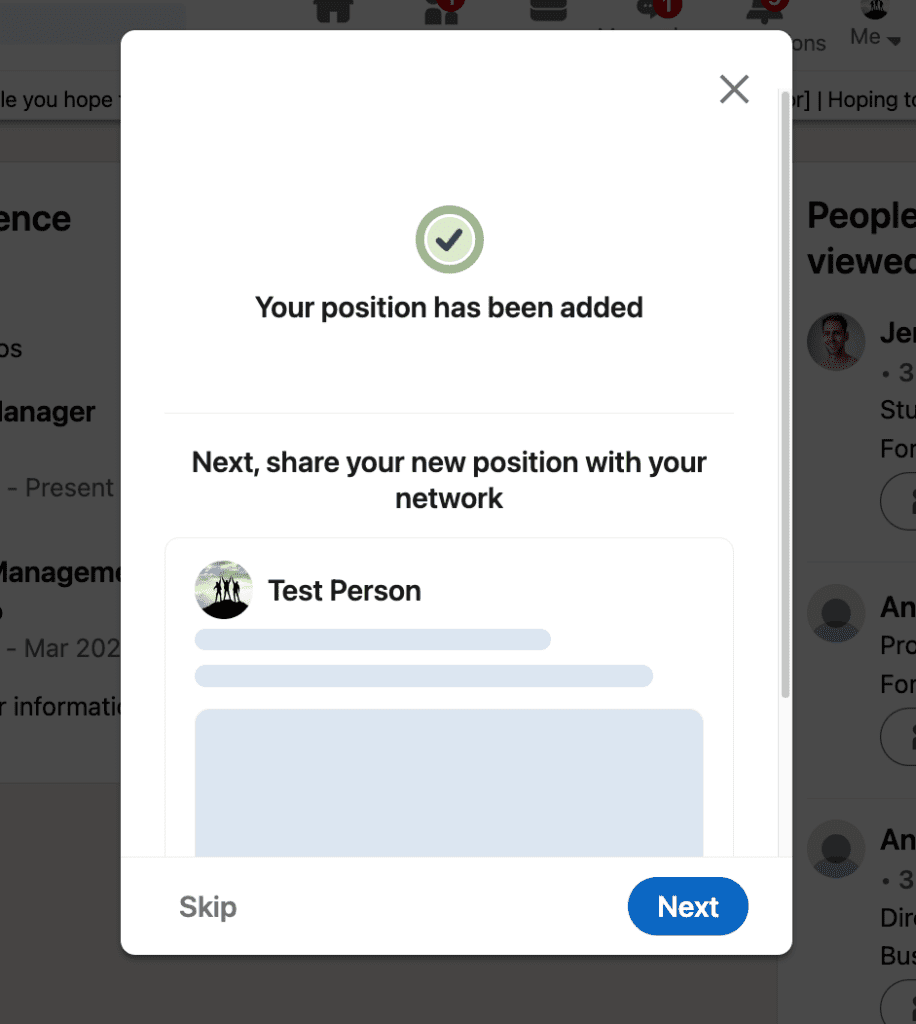
After entering your promotion information, you can add skills or media if you’d like. Or scroll to the bottom of that menu and hit save. A new box will pop up, allowing you to share the good news with your network, but you can skip this.
Enjoy Your New Role
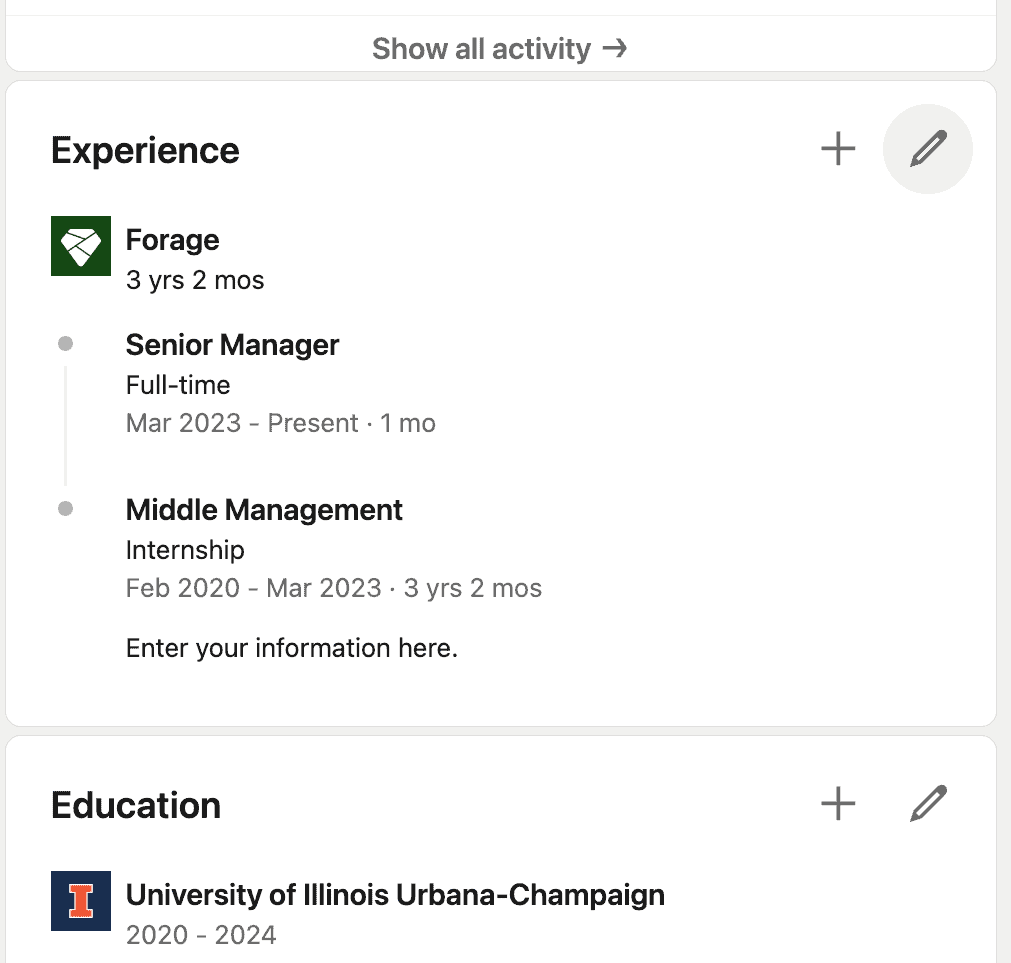
After that, you’ll be taken to your profile page, where you can admire your new title and double-check the details.
Putting It All Together
Here’s what it looks like to add a promotion on LinkedIn from start to finish:
Method 1:
Method 2:
Check out more tips and tricks to get the most out of your LinkedIn profile:
- How to Add a Certificate on LinkedIn
- When Should You Update Your LinkedIn Profile With a New Job?
- Updating Your Profile on LinkedIn: Skills You Should (and Shouldn’t) Add
- How to Find and Reach Out to Recruiters on LinkedIn
- How to Upload or Add Your Resume to LinkedIn
- A Beginner’s Guide to LinkedIn
Image credit: Canva
